In this Article
Vlogging helps your unique voice and story be heard through video content, which builds a strong, meaningful connection with your audience that grows your business.
In this guide, we’ll show you how to vlog—from choosing the best video equipment to the video editing process—and how to connect with your audience in a genuine, long-lasting way.
What is a vlog?
The word “vlog” stands for “video blog,” and it’s exactly that: content that you would write a blog post on, but instead, you talk to a camera about it.
Like traditional blogging, video blogging (or vlogging) focuses on personal topics centering on the creator. For example, makeup routines, book recommendations, and recipe videos.
There are two main styles of vlog: a “talking-head” video, in which the camera stays steady while the vlogger talks about a subject, or a “follow me around” vlog, in which the vlogger takes a camera with them and films clips as they go about their day or week.
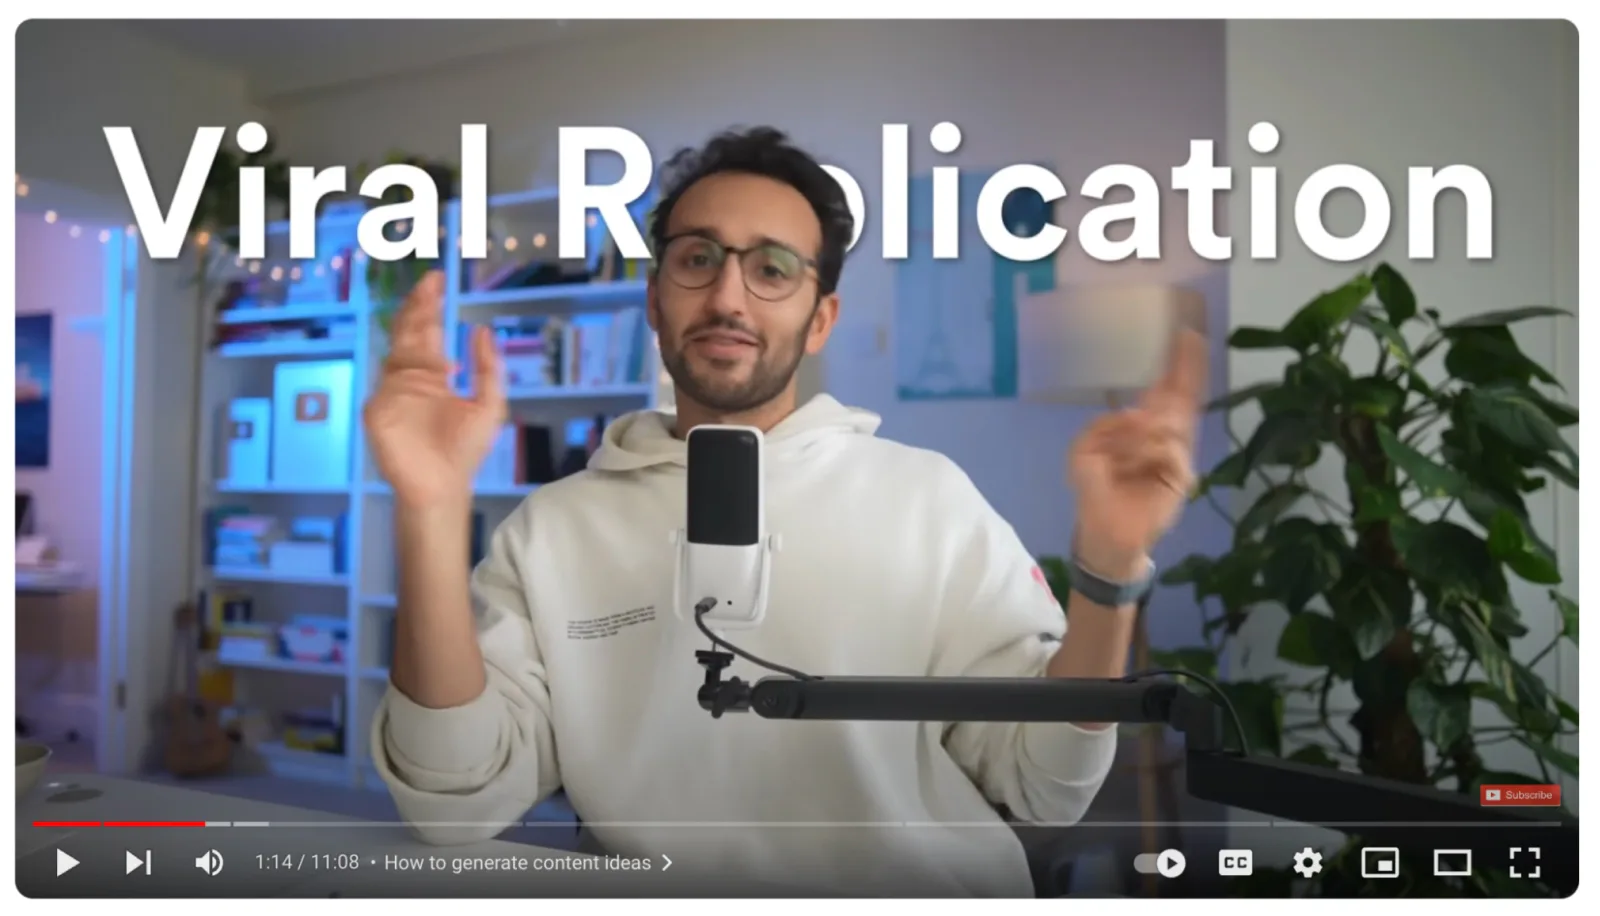
YouTuber Ali Abdaal in a “talking head” video
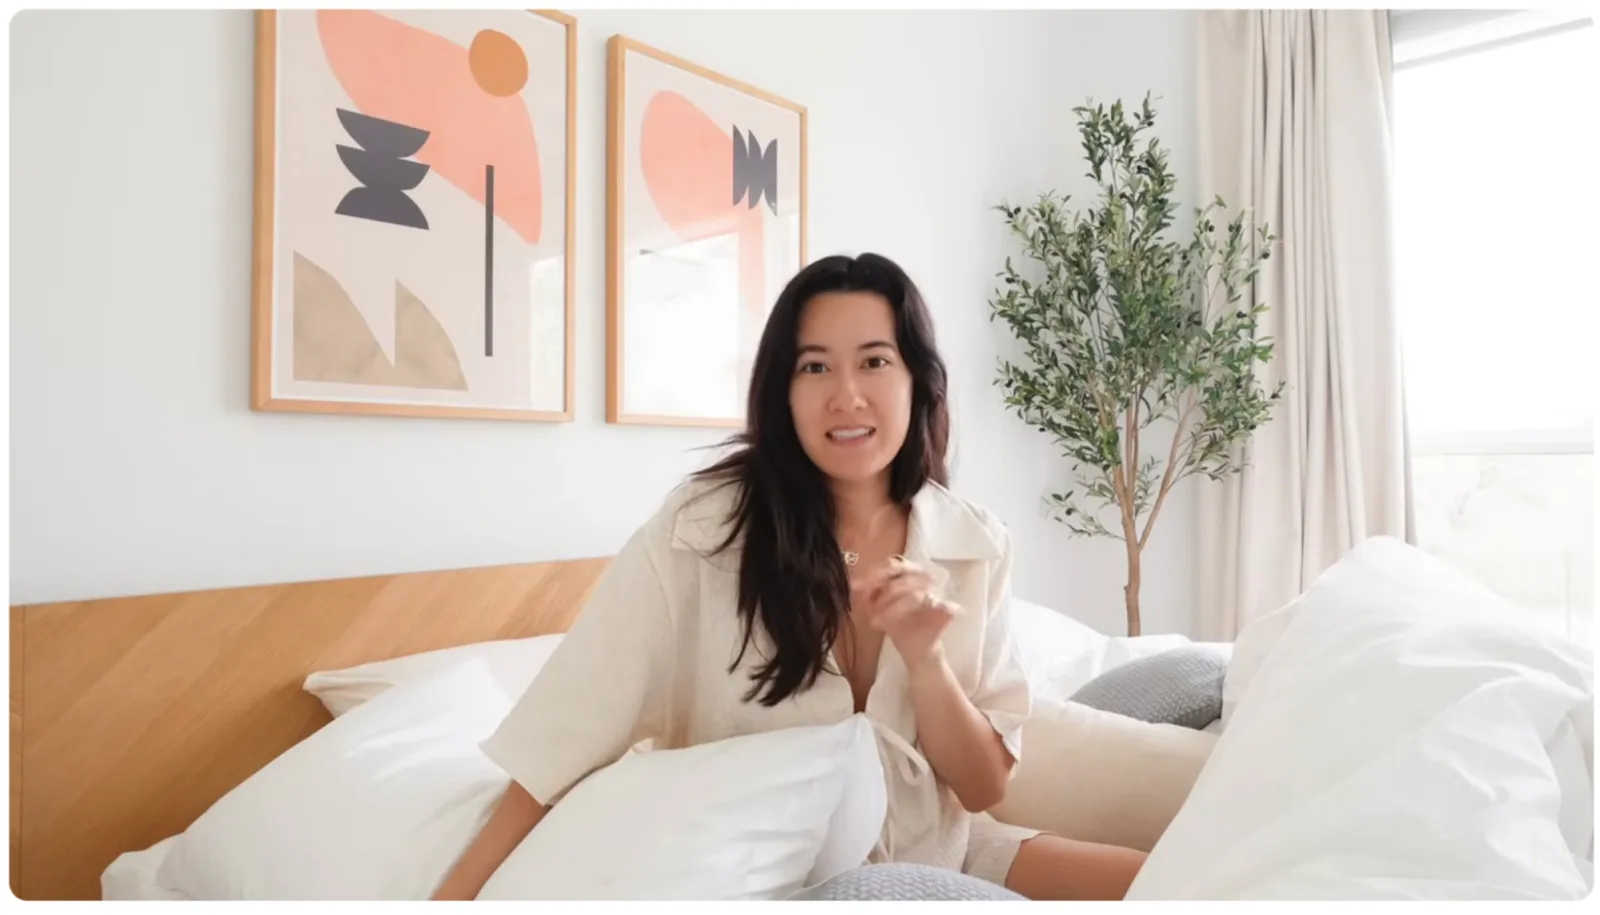
A still from Jules Acree‘s vlog
What’s the difference between a vlogger and a YouTuber?
A YouTuber is anyone who publishes videos on YouTube. These videos could be documentary-style, interviews, or recorded webinars.
In contrast, vloggers create vlog-style content, which is all about the creator’s personal experiences. Vloggers may make videos about their travel experiences, daily lives, or personal style.
Why vlogging is so popular among creators
There are several reasons why more creators are turning to vlogging on YouTube and social media. Here are some benefits of creating in this format:
- It builds a stronger connection with your audience: Compared to writing or podcasting, seeing someone speak to you, even if it is through video, feels more meaningful. When you vlog, you’re letting people see a little piece of your life or thoughts in an intimate way.
- People like to learn from videos: Video is the perfect format for learning. According to Wyzowl, explainer videos are the second most popular video style. Use your vlogs to teach your audience something new.
- It adds another income stream: Vlogging isn’t just a hobby. On average, vloggers in the US earn up to $5,000 a month, depending on their audience size and monthly views, according to ZipRecruiter.
Do vloggers get paid?
Yes! Many vloggers earn a good living from making videos online. There are several ways to make money on YouTube and social media as a vlogger, including displaying ads through Google Adsense, brand sponsorships, affiliate marketing, and channel memberships.
How to get started with your vlog in 9 steps
- Create your vlogging strategy
- Choose the best video platform for you
- Buy the video equipment you can afford
- Set up a dedicated vlogging space
- Practice to be engaging and confident on camera
- Record your video
- Edit the videos
- Upload and schedule your vlogs
- Track your online video metrics
Step #1: Create your vlogging strategy
There are two key parts of your vlogging strategy.
One is your goal for making vlogs. Are you making vlogs to educate, promote your products, entertain, or simply share your life online? Knowing your goal helps you figure out how to use your vlogs to achieve it.
Next, you’ll also need to decide what kinds of vlogs you want to make. For example, do you prefer talking straight to the camera, or would you rather take viewers through your day with a voiceover? Some YouTubers combine both styles.
Here are some steps to help you figure out your strategy.
Determine your niche and audience
Choosing a niche helps you grow faster because your videos are more likely to show up in search results for that topic. It also ensures that when people talk about your channel to their friends, they’ll know exactly how to describe it. You’ll build an audience that sees you as their go-to source on a specific topic.
Look into other vloggers in your niche
Usually, most creators who become vloggers already spend a lot of time watching other people’s vlogs. Taking time to study what other vloggers in your niche share with success is a great way to see what kinds of content may appeal to your audience.
Tip: Avoid the trap of creating content like everyone else. Try new things even as you follow some classic, winning formats. This allows your unique voice to shine through.
Map out your video content plan
Having a content plan is an important part of a successful vlogging strategy. Your video content plan should include a long-term vision (what you want to be known for), a broad range of subjects and subtopics you can cover as a vlogger, and a consistent publishing schedule.
If you’re not sure what you want to vlog about, consider simply documenting your life. Share your highs, lows, and daily experiences. Eventually, people will follow you because you are relatable, or sometimes, a central niche will organically become apparent in your content over time.
Step #2: Choose the best video platform for you
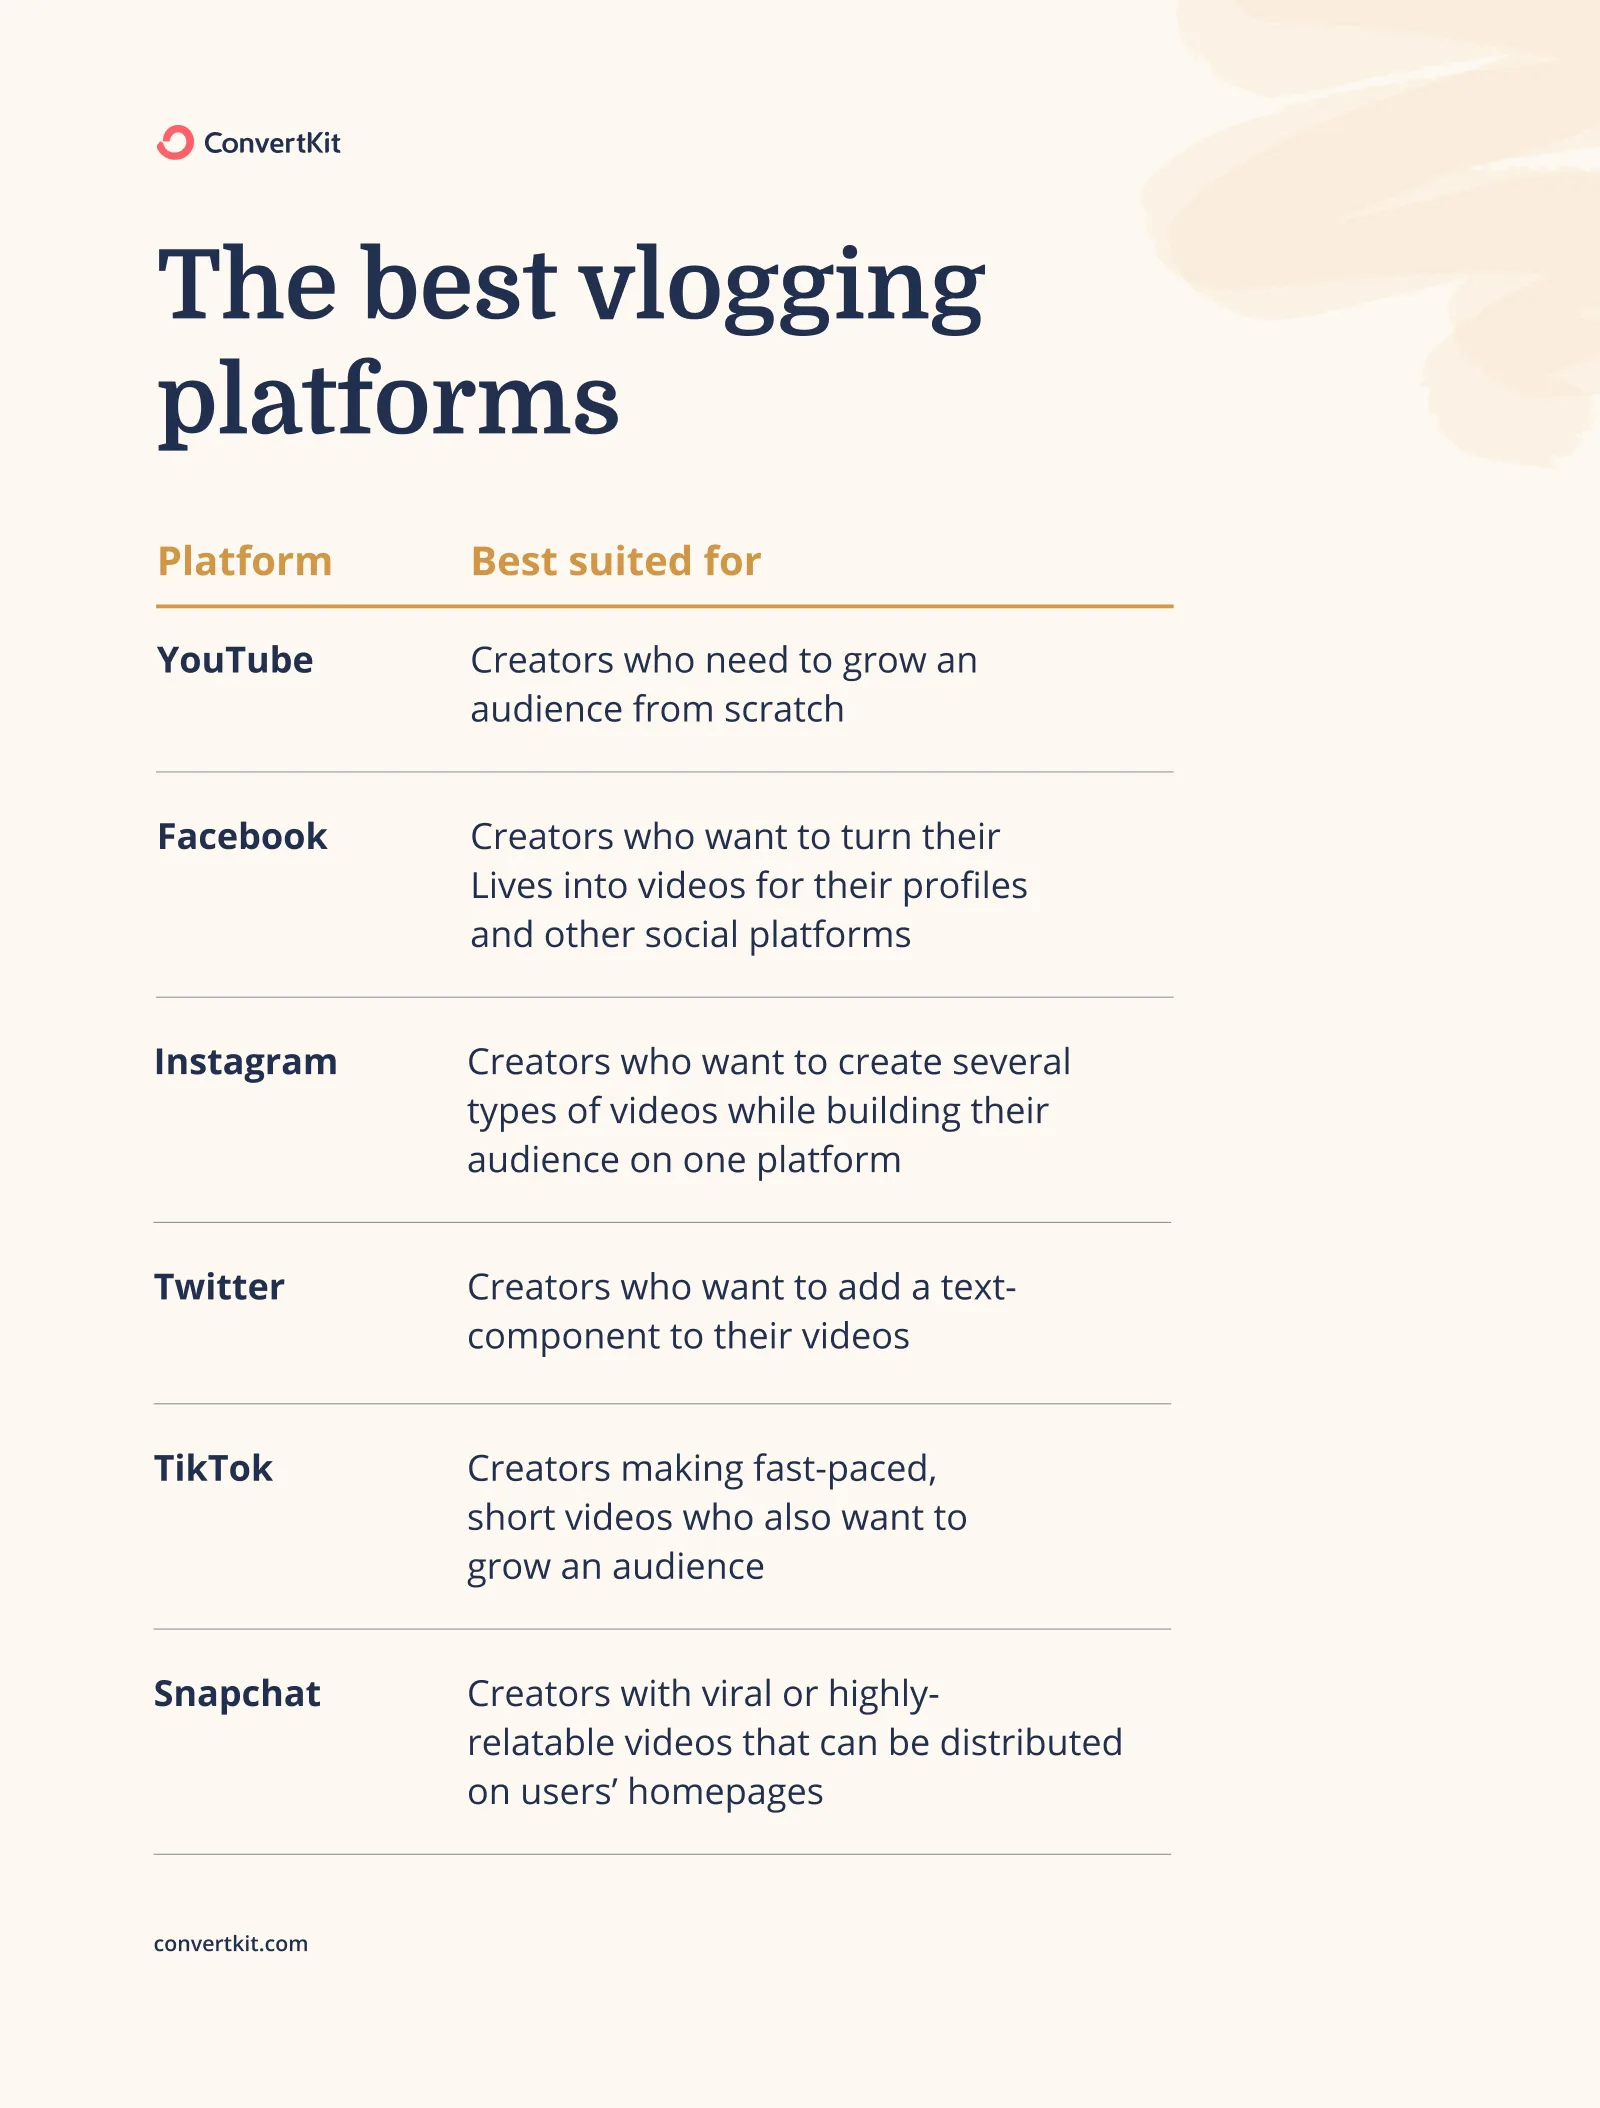
Once you start recording videos, you’ll need a place to distribute (or host those videos, depending on what your strategy is).
Here are some video platforms we recommend for different types of vloggers:
- YouTube: YouTube is a free video hosting platform that allows users to share everything from Shorts (up to 60-second clips) to longer videos and livestreams. Creators can monetize YouTube videos by displaying ads using Google Adsense. YouTube is perfect for new creators looking to make money by making longer vlogs, as it recommends your videos to a wide range of audiences.

- Facebook: Social media platform Facebook offers free live streaming and video-sharing capabilities. Users can now monetize Facebook videos by displaying ads, running paid online events, or selling products in their videos. This platform is great for creators with a Facebook audience eager to watch their videos online.
- Instagram: On Instagram, you can create Lives, Reels, and Stories. Instagram is free to use, can also be monetized, and is great for vloggers who prefer to create short-form content while building a community online.
- X/Twitter: X/Twitter is a free social media platform designed mostly for text posts. However, it also allows users to share short videos in-feed, and videos perform well on X/Twitter. Since it’s not a largely video-based platform, X/Twitter is best for sharing snippets of longer video content or short-form videos. Users can also monetize videos on X/Twitter.
- TikTok: TikTok is a great free option for brand-new creators who want to create visual content and are ready to grow their audience fast. TikTok also has a Creator Fund that pays its creators based on views.
- Twitch: Twitch is the perfect choice for vloggers who need a strictly live-streaming platform. It’s free to use and allows creators to receive support from their audience in the form of subscriptions.
Step #3: Buy the video equipment you can afford
What do you need for vlogging?
To start vlogging, you need a camera (or a phone with a good camera), a microphone, and video editing software. If you’re just starting out, it’s best to choose the essential tools that fit your budget. Our suggestions below can help you find video recording equipment options for $100 USD, $500 USD, or $1000 USD.
Camera
The camera is the heart of any vlogging operation. Here are some camera options for every level:
- Entry level: Use your smartphone camera ($0)
- Intermediate level: Canon Powershot S110
- Advanced level: SONY ZV-1
Tripod
A tripod is important for filming by yourself. Handheld tripods also allow for more stable footage if you’re taking viewers around during your day. We recommend these tripods depending on your budget:
- Entry level: Eicaus Portable and Flexible Phone Tripod Stand for Cellphones
- Intermediate level: Teefeed iPhone & Camera Tripod (54 inches)
- Advanced level: 60-inch Lightweight Tripod With Bag
Microphone
While you can use the built-in mics of your recording device, having a good microphone will make your videos a pleasure to view. Here are some of our top recommendations:
- Entry level: RØDE smartLav+ Lavalier Microphone for iPhone and Smartphones
- Intermediate level: RØDE Wireless ME Ultra-compact Wireless Microphone
- Advanced level: The Rode VMPR VideoMic Pro R
Memory Cards
Once you start recording on a camera, you’ll need to invest in some memory cards so you never lose valuable footage. Here’s what we recommend at each level:
- Entry level: Smartphone memory/Cloud storage
- Intermediate level: SanDisk Extreme 32GB SDHC Memory Card
- Advanced level: 128GB 2-Pack SD Card
Lighting kit
As you start making more videos, you might want to improve your lighting, and we have suggestions to help you make that happen.
- Entry level: Sit facing the light source in a room with lots of natural light
- Intermediate level: Sensyne 10” Ring Light with 50” Extendable Tripod Stand
- Advanced level: Torjim Softbox Lighting Kit
Teleprompter
If you struggle with remembering everything you need to say while filming, you might find a teleprompter useful.
- Entry level: Cue cards or online teleprompter
- Intermediate level: Online teleprompter
- Advanced level: NEEWER X12 14-inch Aluminum Alloy Teleprompter
Editing software
There’s video editing software for every skill and budget level. We recommend these options:
- Entry level: iMovie, Capcut
- Intermediate level: Adobe Premiere Pro
- Advanced level: Final Cut Pro
Step #4: Set up a dedicated vlogging space
If you make a lot of “talking head” videos, it would help to set up a dedicated vlogging space. This allows you to maintain a consistent, aesthetically pleasing background that subscribers can associate with your content. It also means you’ll spend less time setting up your equipment for each video.
Once you’ve furnished your recording space with the items you’d like to feature in the background, it’s time to set up the tech details.
Set up your equipment: Check that your camera or phone battery is full and that it’s set up on a tripod (or a stack of books if you don’t own one of those) so it will stay steady as you film. Take note of the following three elements to shoot beautiful footage:
- Lighting: If studio lights aren’t part of your equipment setup, filming in front of a window is the best way to ensure you’re well-lit.
- Framing: Pay attention not only to where you are in the video frame but also to what’s in the background. Keep the background tidy and add interesting elements like a bookshelf or gallery wall for some extra personality.
- Audio: For clean audio, use a good microphone, place it close enough to you, and turn off sources of distracting noises like fans and running taps.

CharliMarieTV spruces up her YouTube background with a gallery wall
Step #5: Practice to be engaging and confident on camera
It’s true: Not all personalities naturally lend well to being in front of the camera. Still, you can learn to be camera-confident! Start by putting on your favorite outfit, makeup, or whatever makes you feel more confident, and then try these four tips:
Write a script or use cue cards
Improvising your videos typically leads to more bloopers than usable content. With a script or cue cards, you can turn the camera on and know that a lot of the hard work is already done. Now, your only job is to read what you’ve already put together for yourself.
Rehearse speaking out loud
The key is getting used to each word and sentence and feeling confident in what comes next. When you practice aloud, you help your mind feel more comfortable with the content. By the time you hit record, you’ll be so familiar with the content that you’ll breeze right through it.
Batch the recording of your videos
From your list of video ideas, select four or five related topics and record all of them in one day. Remember to change your top for every video so each video has a fresh look. Batching will help you get comfortable with the recording process faster and spend fewer days shooting.
Ask a friend to stand behind the camera
Asking a friend to stand or sit behind your camera as you record can remind you to use the body language and cues you do in regular conversation. This can make your content feel more natural, particularly if you’re really struggling to add your personality to your video.
Step #6: Record your video
It’s time to shoot your first vlog! Follow these steps to record your video (and be patient; the first time can be a bit tricky):
- Film a test clip: Always film a test clip just a few seconds long so you can review it and check you’re happy with the lighting, framing, and audio.
- Skim through your notes: You don’t need to write a script or learn lines, but your filming process will go much smoother if you at least have a rough outline of what you want to say.
- Take a few deep breaths and hit record: Get yourself ready to be on camera and let your personality shine through as you talk. Double-check that the camera is recording.
- Smile and start talking straight into the lens: It’s always nice when the first frame of your video starts with a smile! Focus your gaze at the center of the lens so viewers feel like you’re talking to them.
- If you mess up, start the sentence over: Starting the entire sentence over makes it easier to edit and produces more seamless results than cutting and joining two separate sentences.
- Do a few takes: Give yourself options! If there’s a part in your video you’re not 100% sure about, try saying it a few different ways. You can pick the best version in the editing process.
- Pose for a thumbnail: When you’re done filming, take a few seconds to capture the image for your video thumbnail. You can do this by taking self-timer photos or just keep the camera rolling as you pose, and export the frame you like later on.
- Scrub through the footage: Go over the recording again to make sure you’re happy with everything. It’s better to find out now if there’s anything that needs tweaking rather than when you sit down to edit.
- Save the files: There’s nothing more frustrating than accidentally formatting a memory card and erasing footage from a video you haven’t edited yet! As soon as you’re done filming, save your footage to your computer or hard drive to avoid memory card mishaps.
Step #7: Edit the videos
On a basic level, video editing is taking footage, removing the pieces you don’t want, and keeping the pieces you do. As you learn how to edit videos, you might choose to include more complex elements, but we’ll walk you through the basics.
Remove mistakes and keep only the best footage
On your first pass of editing, you’re looking for your best takes and cutting away any footage that isn’t meant to be there–like the start of a clip where the camera is still pointing down at your feet or any long pauses. This part will give you an idea of how long your final video will be, and you’ll have all the pieces in place to start fine-tuning and adding detail.
Tighten up the edit to keep viewers engaged
This phase is all about trimming the fat. Do a second pass through the footage, looking out for any mistakes or awkward pauses at the start of a clip that you missed the first time around, and remove any non-essential clips that don’t add much value or slow down the video’s pace. To successfully tighten up your video, do these two things:
- Think from a viewer’s perspective: In today’s busy world, you can maintain viewer engagement by making sure every single second in your video serves a purpose. If you’re rambling or if that vlog shot of you making coffee is going on too long, they’re going to get bored and stop watching.
- Consider adding transitions: Depending on the video style you’re going for, you might want to consider adding transitions at this stage, too. A good rule of thumb is to only use one when changing “chapters” in your video or changing location.
Add titles and supporting footage
Titles and ‘B-roll’ (supporting visual footage) can be great ways to add a layer of professional polish to your videos and help keep the pace moving. For example, text on the screen saying the name of the video, the day of the week, or the location in a vlog can help add context. Or, if you’re talking about your workflow, for example, you could insert some shots of yourself working at your desk for extra visual interest.
Step #8: Upload and schedule your vlogs
Whether you’re uploading on Instagram or YouTube, you’ll need to create and upload thumbnails, write appealing copy (and optimized titles, for YouTube), and add a relevant call-to-action to drive traffic to affiliate links, your website, or mailing list.
Step #9: Track your online video metrics
Depending on your video platform, you can track many different video metrics. For this guide, we’ll share the five crucial ones that apply regardless of platform.
Watch time
Watch time refers to how long viewers have spent watching your videos. Often, a longer watch time means your viewers find your videos engaging. To improve your watch time, create shorter videos about subjects your viewers are interested in. If you’re new, this may require some trial and error to figure out.
Average view duration
The average view duration indicates the amount of time an average user spends watching your online video content. Like watch time, this metric measures how interesting viewers find your content and can be improved by creating shorter videos or creating content about topics your viewers enjoy.
Subscriber growth
Finding people who like your content enough to subscribe or follow your account is a good sign of progress, so this is a critical metric to monitor. Continued growth also indicates that you’re retaining old subscribers even as you reach new ones.
Focus on growing by truly connecting with your audience instead of seeking out shallow tactics to go viral, as slower growth is often more sustainable.
Click-through rate (CTR)
Click-through rate refers to the percentage of people who choose to watch your videos when they see them recommended on video platforms. A high click-through rate means that your video titles and thumbnails are compelling and encourage people to click and watch.
If you’re struggling to get any clicks or plays, it might be worth workshopping your copy so it’s more appealing.
Engagement (likes, comments, shares)
Viewers can “engage” with your videos by liking, commenting on them, or sharing them with their network. The value of engagement metrics differs from platform to platform, with many social platforms valuing shares as the most significant metric.
You can increase your desired engagement by asking viewers to like, comment, or share, asking for viewer opinions in your videos, and running giveaways that require engagement for entry.
How to build a connection with your viewers
Now that you’re a pro at creating and editing videos, you’ll need to work on fostering connection with your viewers.
Engage with your audience
Interacting with your audience is one of the best ways to build a community and a solid following. You can interact with your audience by replying to comments, commenting on other creators’ videos, and asking your followers for feedback on your videos.
Optimize search for each platform you use
Every platform is different, but most video platforms recognize the presence of relevant keywords or phrases. So, one easy way to optimize your content is to research which keywords your audience is searching for and include them in your video titles where appropriate.
Brand your vlog channel and videos
Make your channel memorable by using unique branding. Each platform provides different branding opportunities, but one common way to set your content apart is to brand your video thumbnail using consistent design and fonts so your viewers can recognize your content even before they see your username.
Get your viewers to join your email list
There’s only so much you can connect with your audience on social media platforms where caption word counts are limited, and it’s harder to learn more about your audience and tailor content to their needs.
That’s where your mailing list comes in. Here’s how to get your viewers on that list:
1. Create an opt-in incentive related to your video
Say you made a video about budgeting or packing for a trip, you could offer related lead magnets like a free budget spreadsheet or packing checklist in exchange for your viewers’ email addresses.
2. Set up a landing page to deliver your incentive
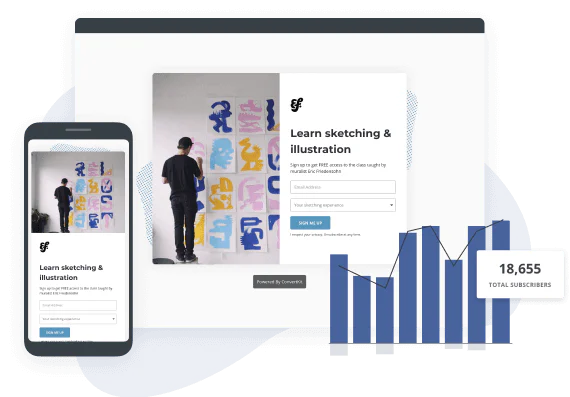
Once you’ve created the incentive, you can build a landing page with Kit (even if you don’t have a website) where viewers can sign up to download the freebie you created.
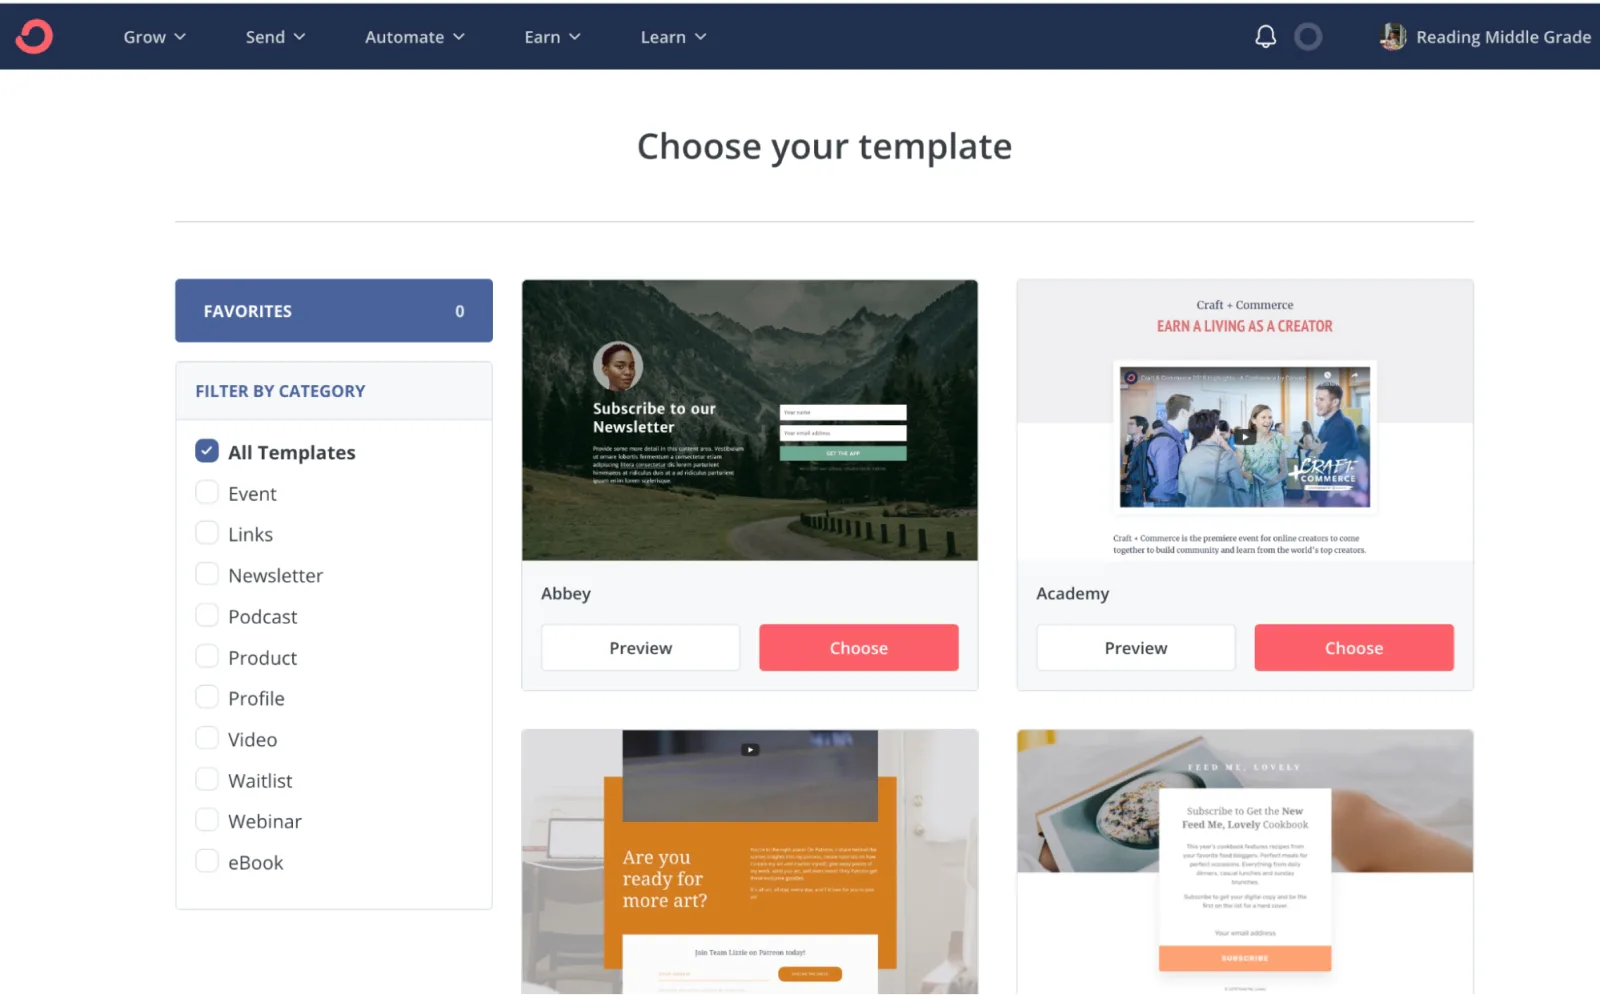
Kit offers many beautiful landing page designs to choose from
3. Promote your landing page’s URL in your videos
Now, it’s time to tell people about your landing page and invite them to join your mailing list. Add the link to your video descriptions and social media profiles, and even display it on screen during your videos as you mention it. There’s no limit to how many times you can share your landing page, so don’t be afraid to self-promote.
Stay connected to your audience as a vlogger using Kit
Becoming a vlogger is hard work, and it can take years to build a dedicated following. When you do, you want a deeper connection than subscriber usernames and view counts—you want to be in their inboxes, too!
Kit helps creators of all kinds—including vloggers—to build stronger, more intimate connections with their audience using email marketing. Send newsletters, offer digital products, and segment subscribers according to their interests and other factors.
Sign up for your Kit account and start building that email list.
